Stock Usage Tab
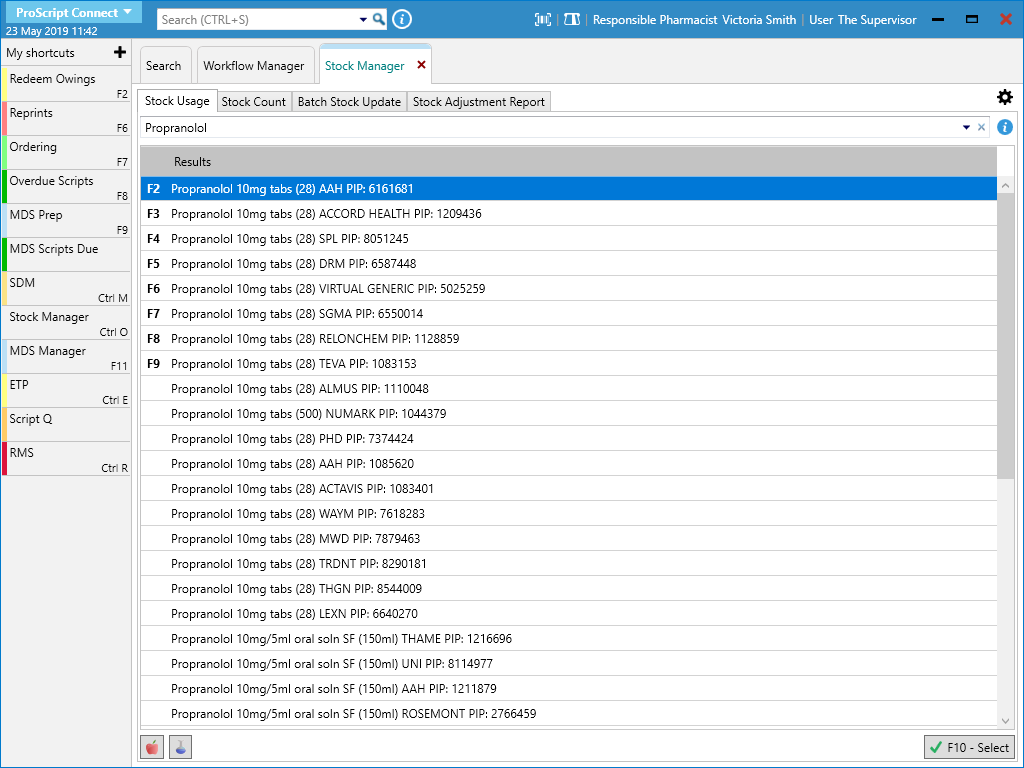
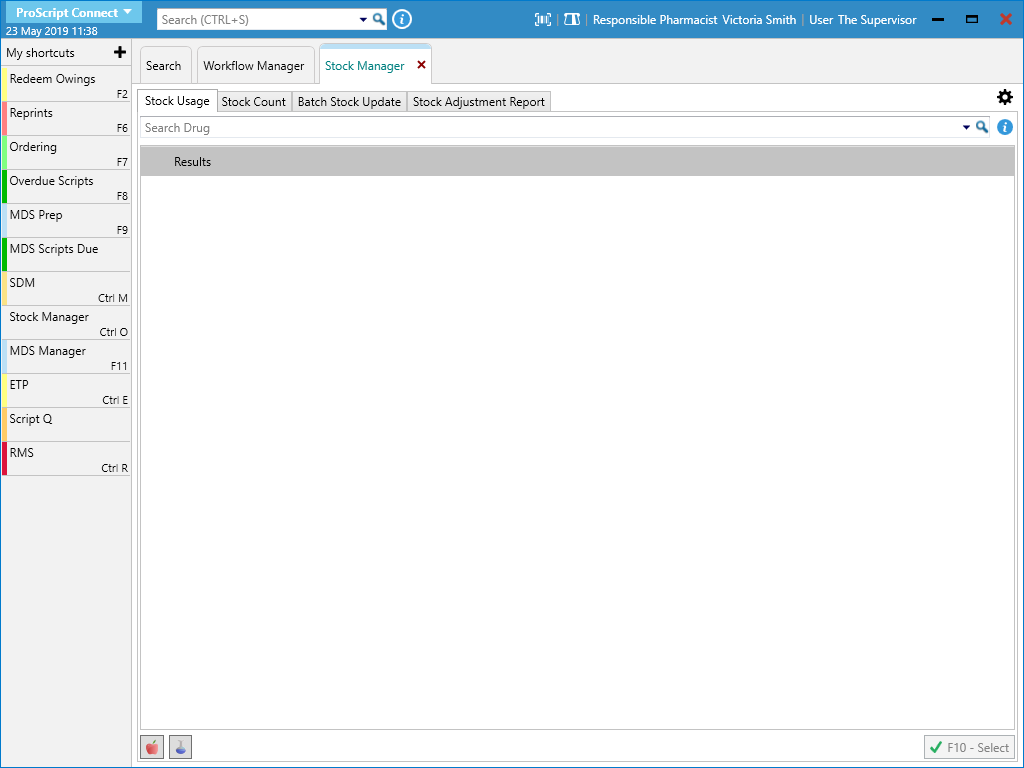
The Stock Usage tab allows you to search for any item at pack level (the individual pack, including manufacturers and pack sizes), and quickly access the Stock Card Function Keys by selecting the [F10 – Select] button.
Stock Count Tab
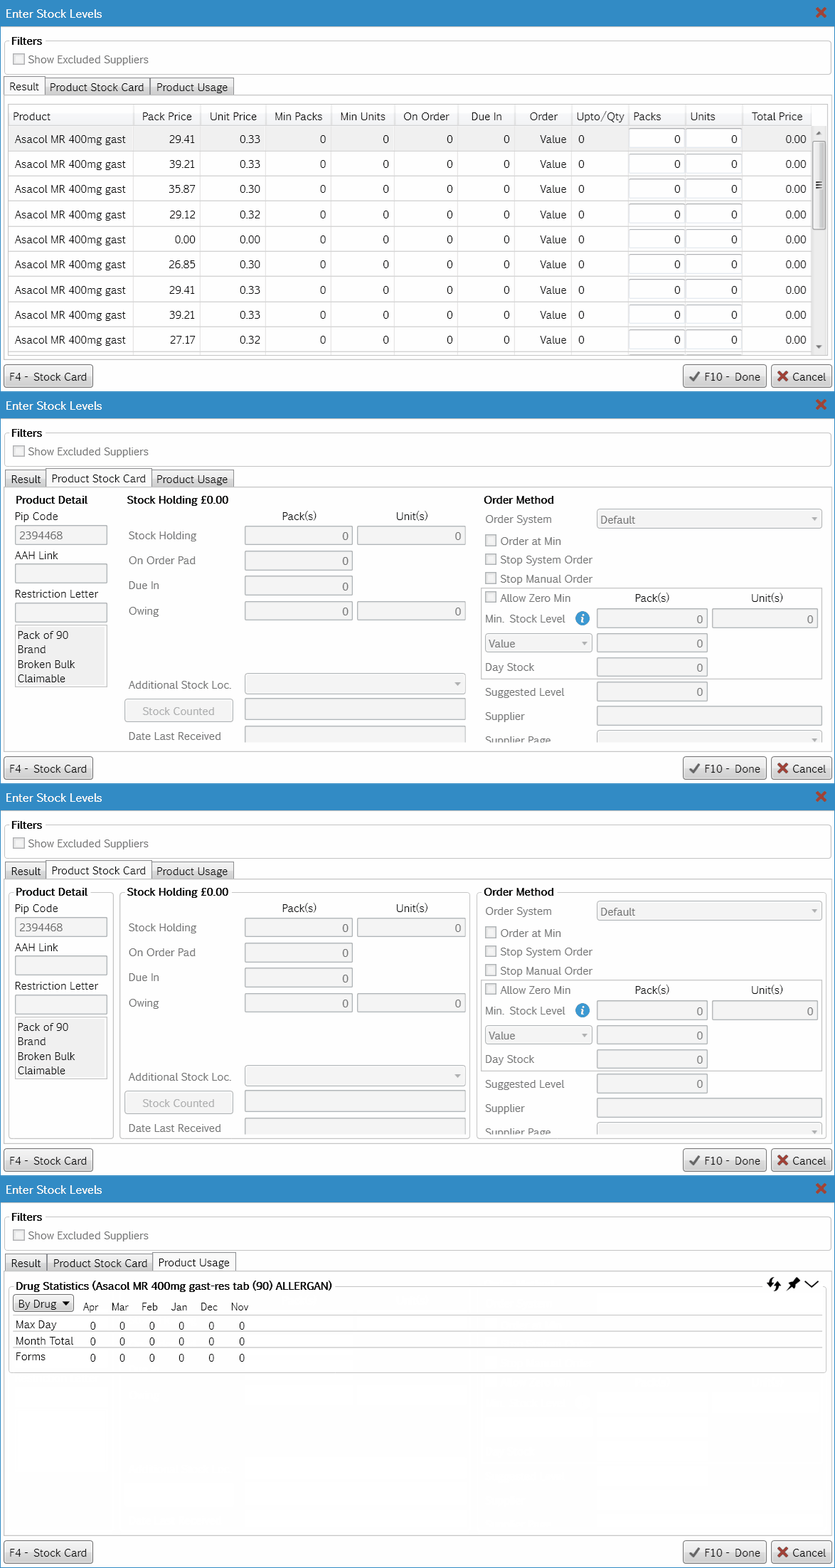
The Stock Count tab enables you to update/view the stock levels for all items within the selected item’s family. From here, you can also view each item’s Stock Card and Product Usage on the available tabs.
- To begin, from the Stock Manager, select the Stock Count tab.
- In the search field, search for and highlight the item and select the [F10 – Select] button.
- The Enter Stock Levels window displays. There are three tabs on the Enter Stock Levels window:
- Result: Update/view the stock levels (in packs and units) for all items within the selected item’s family.
- Product Stock Card: View a read-only version of the Stock Record Card for the item selected on the Result tab.
- Product Usage: View the Drug Statistics for the item selected on the Result tab.
Batch Stock Update tab
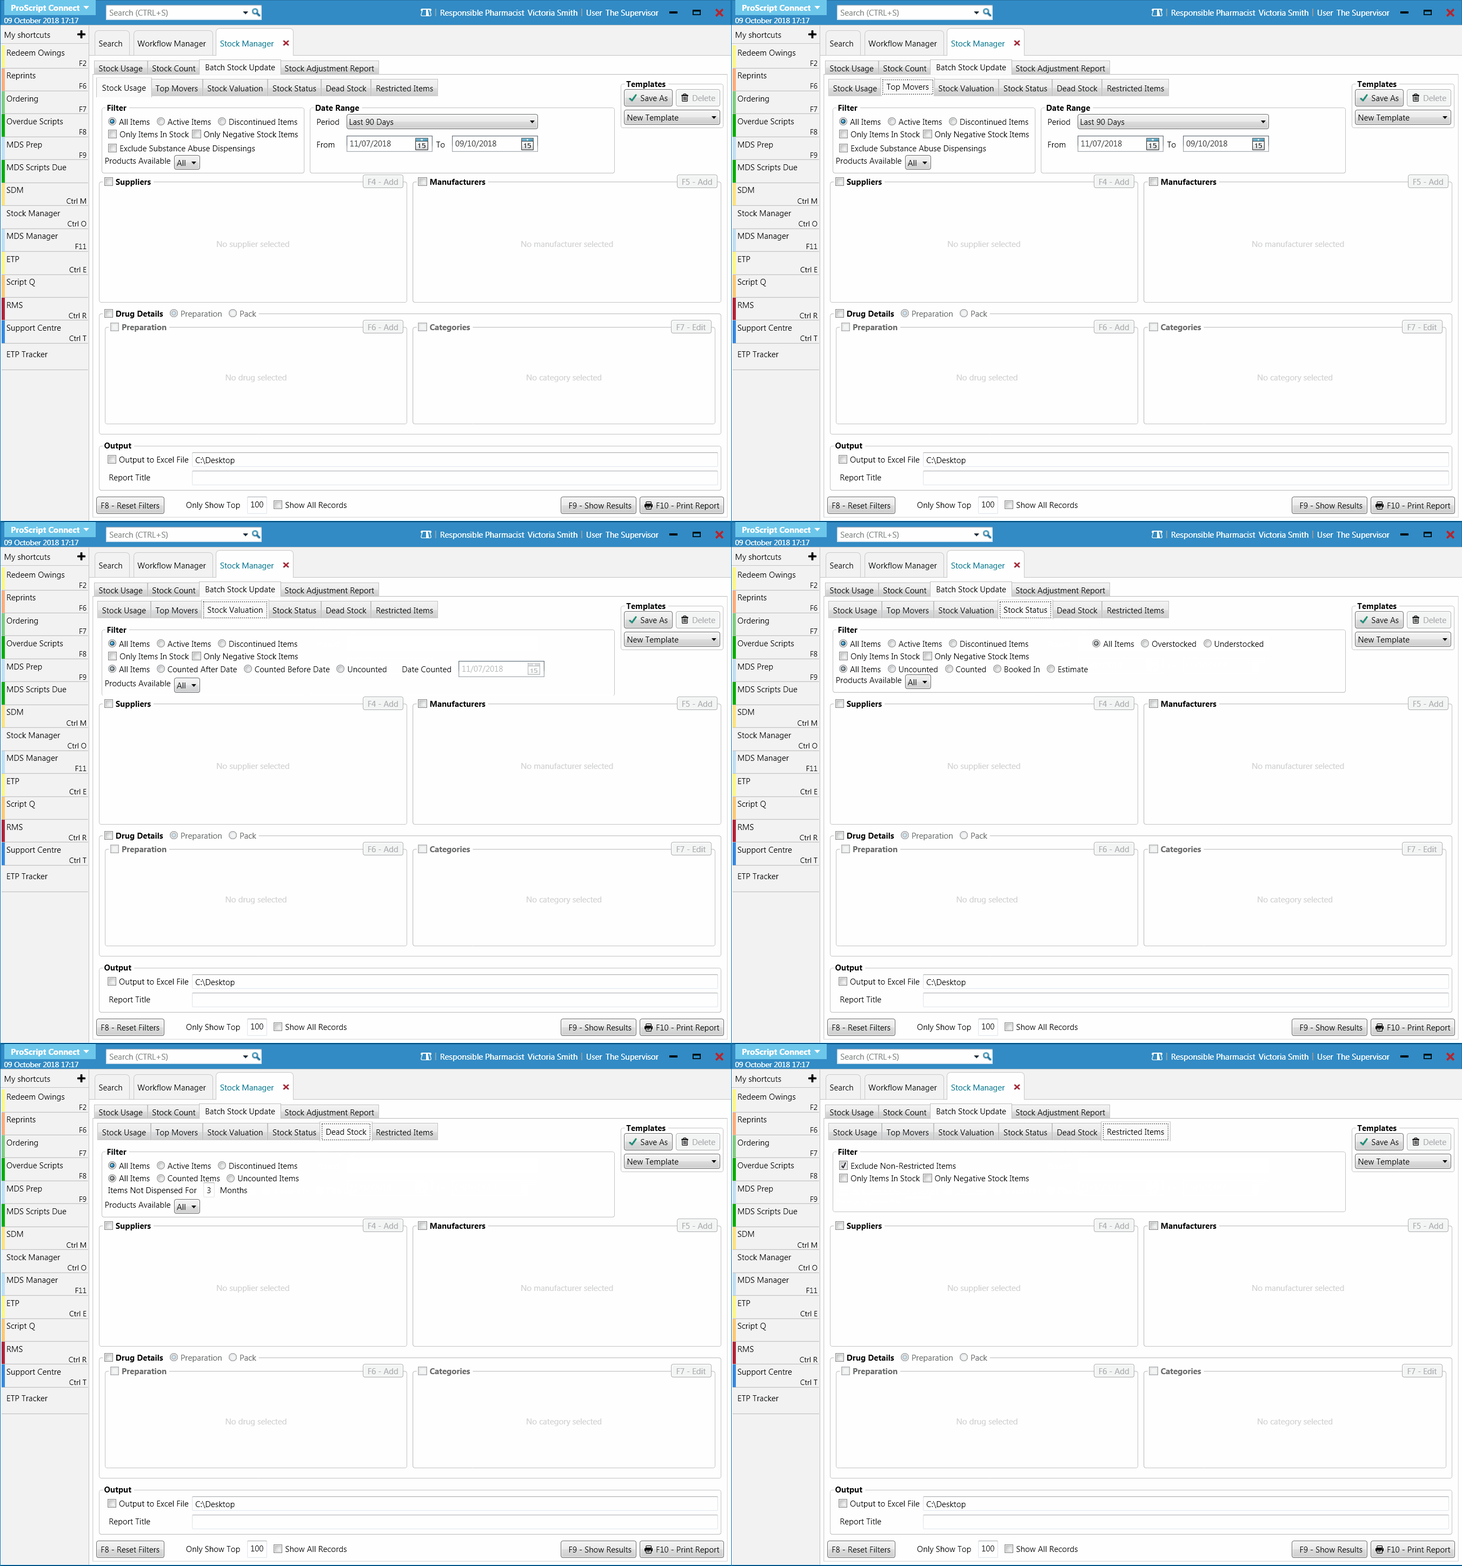
The Batch Stock Update tab enables you generate a list of items based on a variety of criteria – such as Suppliers, Manufacturers and Preparations – to update/view the stock levels.
This tab has six sub-tabs, which will allow you to produce a different set of items, depending on what you are looking to do:
- Stock Usage: Dispensed items in order of the most used forms.
- Top Movers: Dispensed items in order of the most used packs.
- Stock Valuation: In stock items in order of the average value/price.
- Stock Status: In stock items based on their current Stock Status.
- Dead Stock: In stock items that have not been dispensed within a specified number of months.
- Restricted Items: Restricted items from within the Restrictions Manager.
- To begin, from the Stock Manager, select the Batch Stock Update tab, and then select the relevant sub-tab. The selected sub-tab’s contents display.
- Use the available filters and function keys on each sub-tab to select your search criteria. Available filters will depend on the report type you have selected.
| Filter | Description | Sub-tab |
| Item Status | Select to show either:
|
|
| Stock Availability | Select to show either:
|
|
| Exclude Substance Abuse Dispensings | Exclude items dispensed using SDM. |
|
| Products Available | Select to show either:
|
|
| Date Range | Use the Period drop-down menu, or enter a From and To date to select a date range to gather data from. |
|
| Stock Status | Naming and availability of the stock status filter options may vary across the sub-tabs. Select to show items based on their Stock Status:
|
|
| Date Counted | Enter the date before or after which the stock was counted. Only applicable with the Counted After Date and Counted Before Date fields selected. |
|
| Stock Quantity | Select to show either:
|
|
| Items Not Dispensed For | Specify the number of months that items have not been dispensed for by entering a value in this field. |
|
| Exclude Non-Restricted Items | Do not show any unrestricted items. |
|
| Suppliers | Select the Suppliers tick box to activate the field and the [F4 – Add] button. Use this button to add one or more suppliers to filter your report. |
|
| Manufacturers | Select the Manufacturers tick box to activate the field and the [F5 – Add] button. Use this button to add one or more manufacturers to filter your report. |
|
| Drug Details | Select the Drug Details tick box to activate the Preparation and Pack radio dials and the corresponding tick box. Selecting this activates the [F6 – Add] button. Use this button to add one or more drugs to filter your report. |
|
| Categories | Select the Categories tick box to activate the field and the [F7 – Edit] button. Use this button to add one or more drug category from the available list to filter your report. |
|
| Only Show Top | Set the number of records to show on the report. |
|
| Show All Records | Show all applicable records based on your chosen filters on the report. |
|
| [F8 – Reset Filters] | Clear all filters to the default settings. |
|
![]() To save the selected criteria as a search template, use the [Save As] button. You will then be able to select the template using the drop-down list in future.
To save the selected criteria as a search template, use the [Save As] button. You will then be able to select the template using the drop-down list in future.
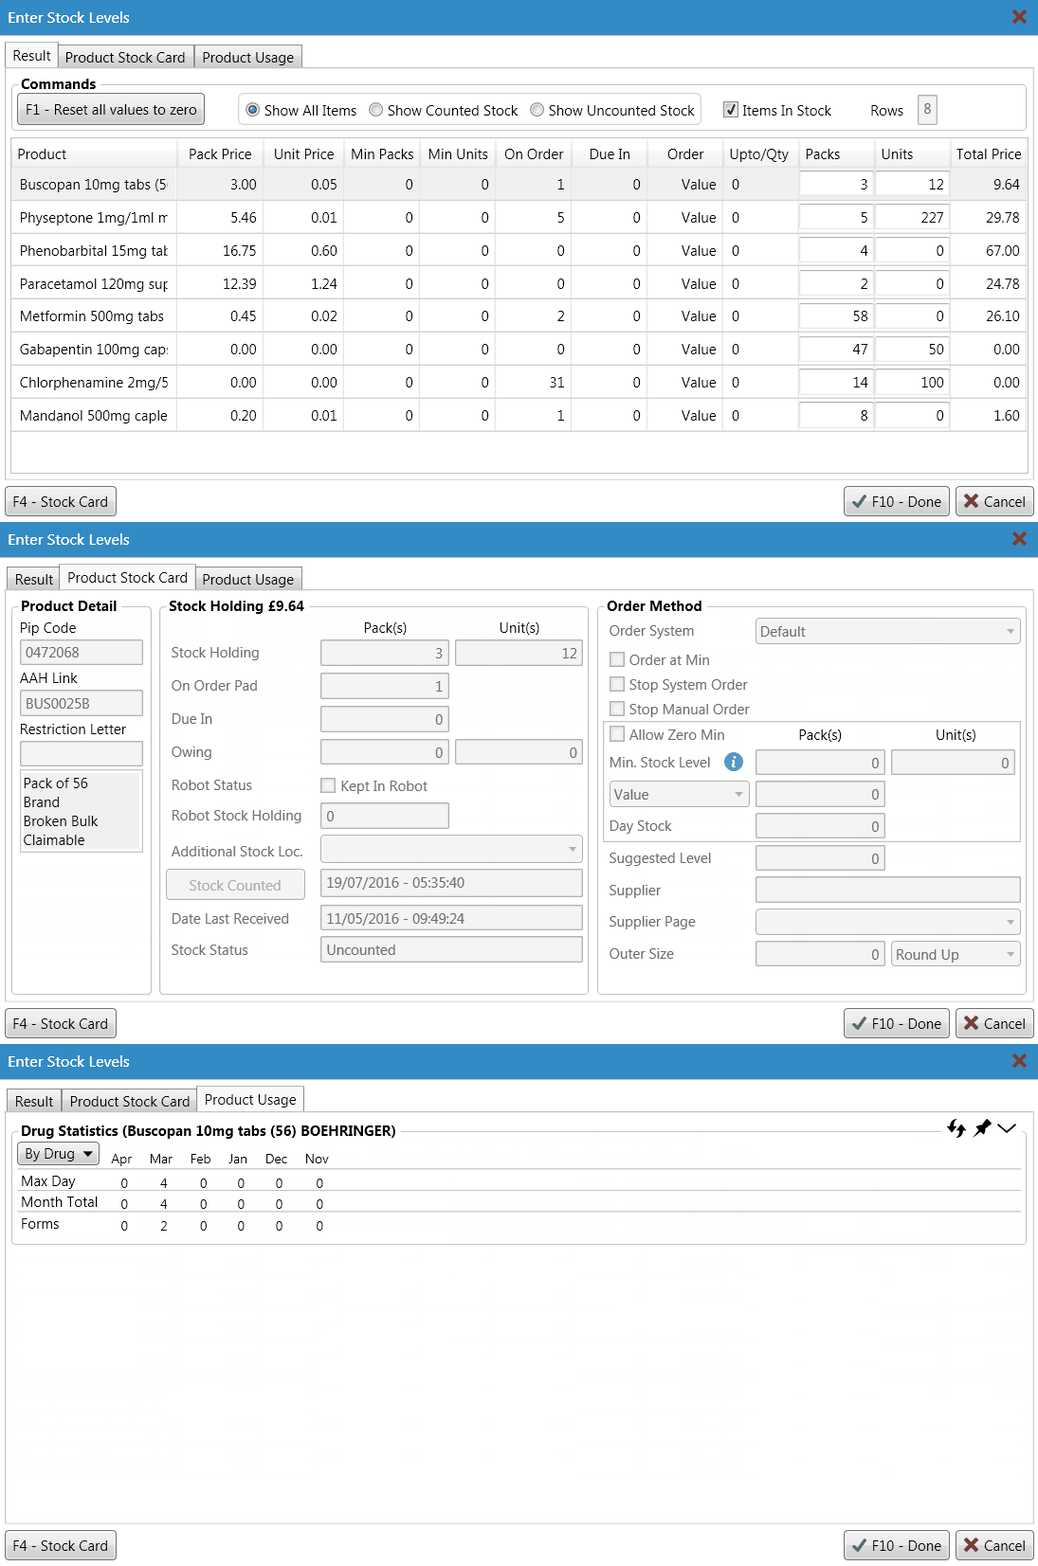
- Once you have selected the relevant criteria, you can select the [F9 – Show Results] button. This will open the Enter Stock Levels window. There are three tabs on the Enter Stock Levels window:
- Result: Update/view the stock levels (in packs and units) for all items within the selected item’s family.
- Product Stock Card: View a read-only version of the Stock Record Card for the item selected on the Result tab.
- Product Usage: View the Drug Statistics for the item selected on the Result tab.
![]() Alternatively, you can print the report by selecting the [F10 – Print Report] button, or export the report to Excel by selecting the Output to Excel File tick box in the Output section, enter in a location on your computer to save the report, and select the [F9 – Show Results] button.
Alternatively, you can print the report by selecting the [F10 – Print Report] button, or export the report to Excel by selecting the Output to Excel File tick box in the Output section, enter in a location on your computer to save the report, and select the [F9 – Show Results] button.
Stock Adjustment Report
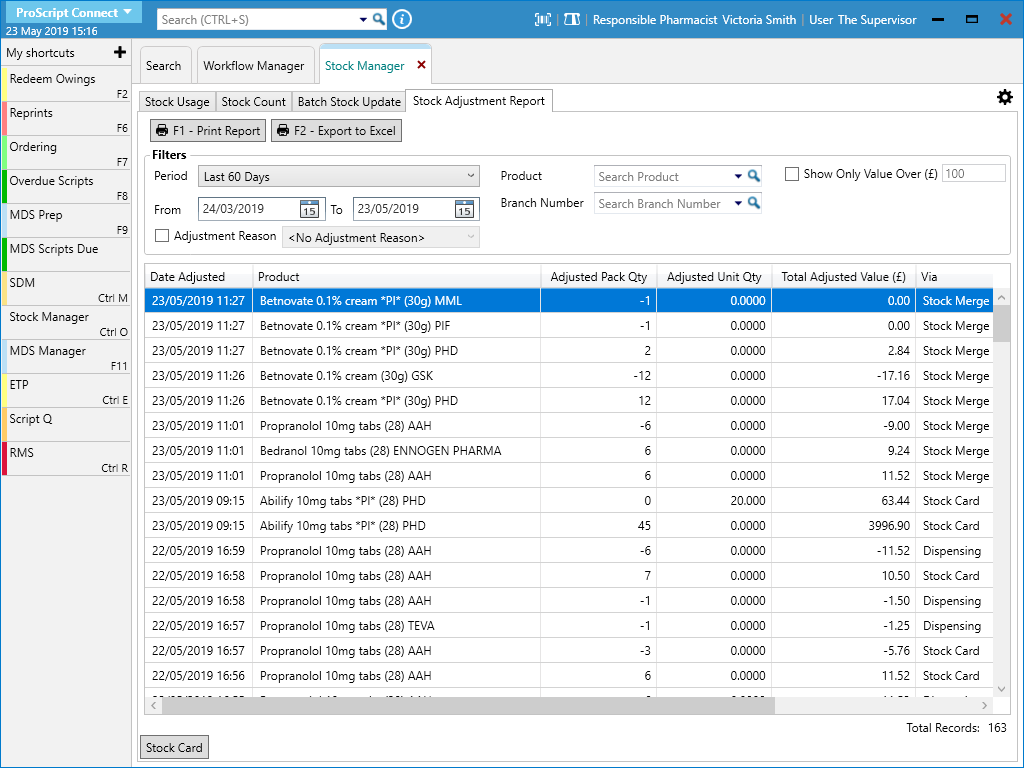
The Stock Adjustment Report tab enables you to view, print and/or export stock adjustment details at item level. Use the available filters to refine the grid to display the information you require
-
- Adjust the date range using the Period drop-down or by selecting a custom From and To date
- Filter by Adjustment Reason by selecting the tick box and selecting a reason from the drop-down menu
- Search by Product and/or Branch Number
- Show items over a particular value by adding a figure in the Show Only Value Over (£) field
Once the grid has been adjusted as required, select the [F1 – Print Report] button to open a print preview of the report, or [F2 – Export to Excel] to save the report to Excel.
![]() You can also access the Stock Record Card from here, by highlighting an item and selecting the [Stock Card] button.
You can also access the Stock Record Card from here, by highlighting an item and selecting the [Stock Card] button.

