Processing scripts using ScriptCheck
 In the following steps, ProScript Connect is configured to dispense items via ScriptCheck by default.
ScriptCheck Opt Out (per patient)
When ProScript Connect is configured to dispense items via ScriptCheck by default, a patient can opt out of having their prescriptions processed using this workflow or the pharmacy could consider the items not suitable to be dispensed by this method.
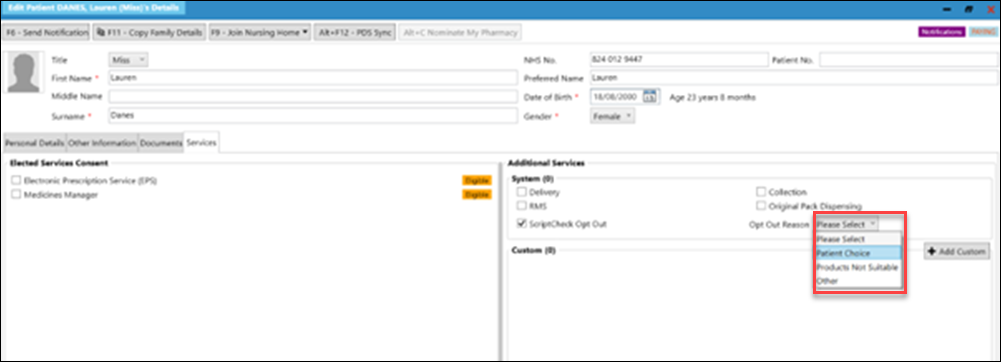
- From the PMR, click F1 – Patient Details.
- Select the Services tab.
- In the Additional Services section, tick ScriptCheck Opt Out.
- Select an Opt Out Reason.
- Click F10 – Save.
When adding prescriptions to the ScriptCheck queue, scripts are dispensed from the ETP module in the usual way. Follow the SOP for your pharmacy.
- From the ETP module, download the EPS scripts. Newly prescribed items are tagged as
 .
.
 Consider printing tokens and dispensing scripts in manageable batches, keeping the tokens for each batch together for completion of the labelling from the ScriptCheck queue. You can use the filters in ETP to view batches based around patient name, script type and more.You may want to disable the Auto Print Dispensing Tokens function from the ETP category of Edit Application Settings. You can print tokens individually, click F8 – Print on the View/Process Prescription screen. A batch of tokens can be printed from F10 – Batch Functions.
- Process the scripts following your local SOP in the usual way, processing EPS scripts.
- From the PMR and prior to endorsing the prescription, notice that the items ready for dispensing are marked by default as
 .
.
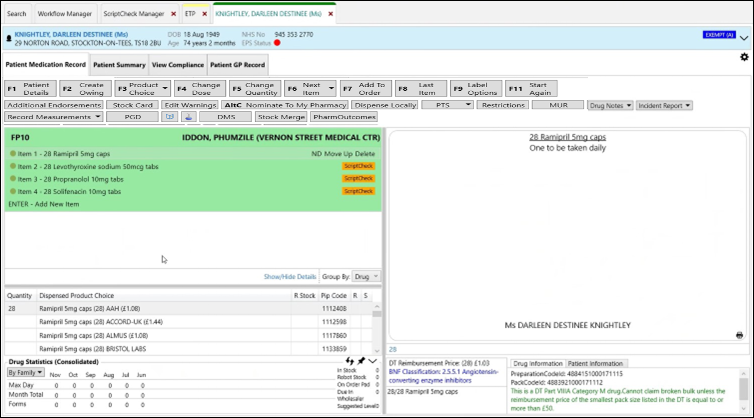
- From the PMR, a script can be locally dispensed, using Dispense Locally. You will need to dispense locally when:
- An owing is created.
- An item requires an additional endorsement being added eg. SSP.
- An item is an MDS item.
- An item is a CD schedule 1 or 2. The acceptance of schedule 3, 4 and 5 is configurable in the ETP category of Edit Application Settings.
- Endorse the script, then click F8 – Last Item.
ProScript Connect can be configured not to print the endorsement by default using the Endorse R2 Prescriptions configuration in the ETP category of Edit Application Settings.
- Click F10 – Save to complete the script.
 By default, no labels will be printed at this stage for ScriptCheck items. However, the following labels may print if configured to do so – alerts and drug warnings, NMS and DMS labels, Prescription Collection Point (PCP) and Pro Delivery Manager (PDM) barcodes. We recommend that these labels are kept with the patient’s dispensing token. If configured, Order basket confirmation and SMS/email notifications may also appear on screen.
 Tip: For scripts that have both local and ScriptCheck items, keep any locally dispensed items with its script to ensure all items are handed to the patient.
Manual ScriptCheck toggle
If the ScriptCheck Application setting is not switched on to dispense items by default, items can be marked individually to be then processed through the ScriptCheck queue.
On the PMR, select the item, then click ScriptCheck.

The item is then tagged as ScriptCheck, and the toggle ribbon option will now display as Dispense Locally.

Once in the ScriptCheck queue, the item is processed as per the instructions in the section above.
For any item that is Dispensed locally, all your usual drug and configured labels are printed.
Clinical check
This part of the process is to be completed only by the pharmacist, as they clinically check each script. Access can be restricted using RBAC. Any previously dispensed prescription for the same patient, where all items have previously been clinically checked, may retain the clinical check for up to 6 months, subject to no changes being made.
 The retention of the clinical check has been registered as a Medical Device and is marked with the UKCA certification.
Clinical check logic
At any time, you can access an explanation of how the clinical check retention works. Simply roll over the info icon  to the right of the blue bar.
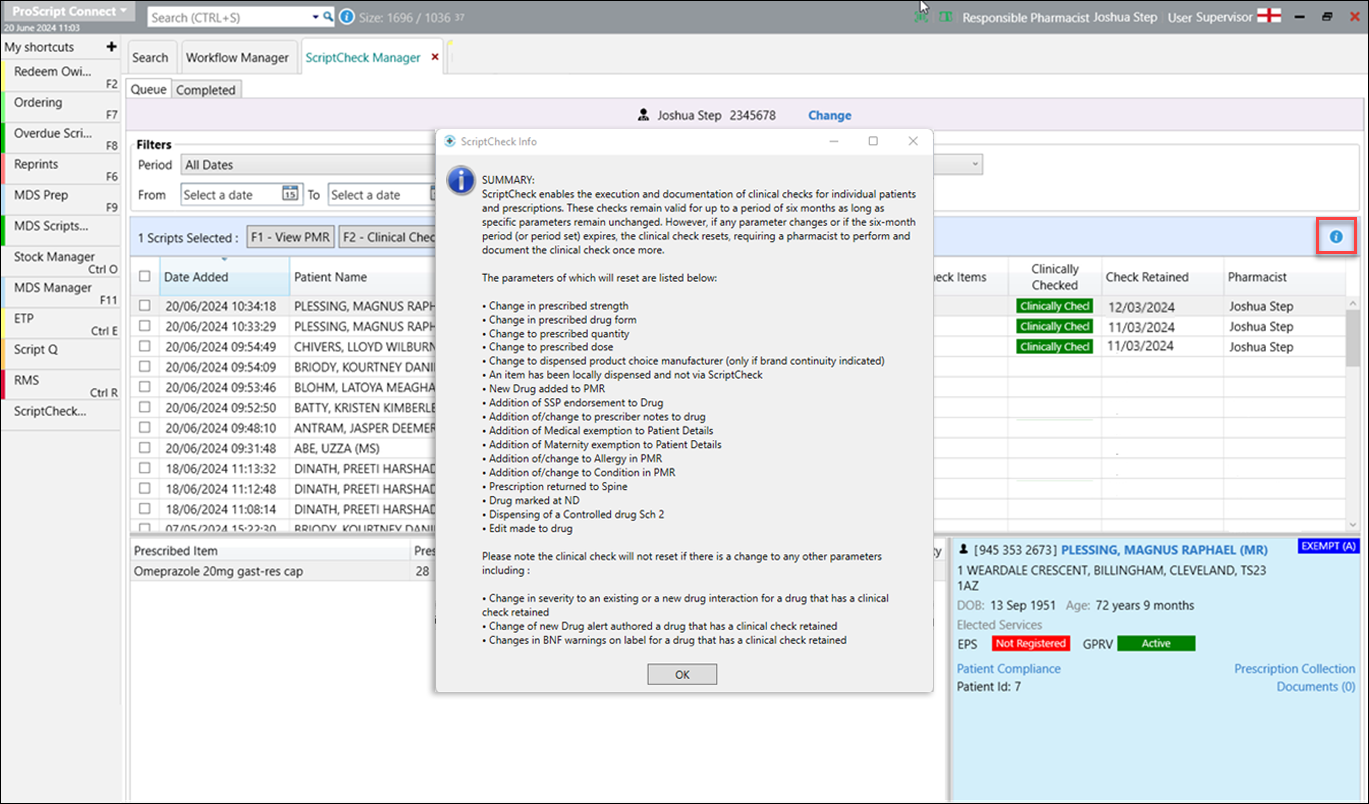
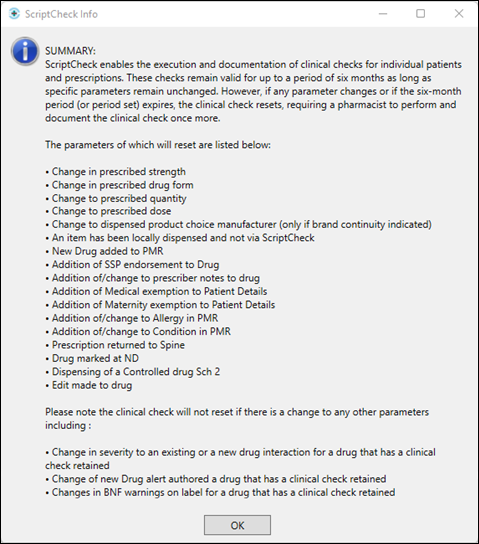
The retention of the clinical check has been registered as a Medical Device and is marked with the UKCA certification.
When ScriptCheck is first used, no scripts will have a retained clinical check. Scripts with a retained clinical check will gradually build up as the functionality is used.
- Click the ScriptCheck Manager shortcut or, from the main screen, click ProScript Connect, then click ScriptCheck Manager.
- On the ScriptCheck Manager screen, in the Queue tab the list of scanned scripts is displayed. Filters can be applied including CC Status (Clinically Checked Status).
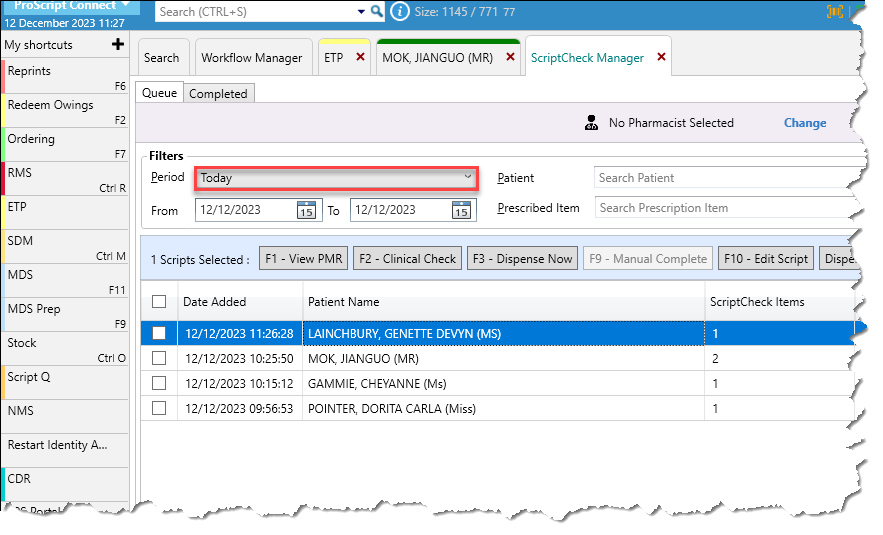
 Tip: Use the filters to view only the scripts required to be processed at this time, e.g. Today.
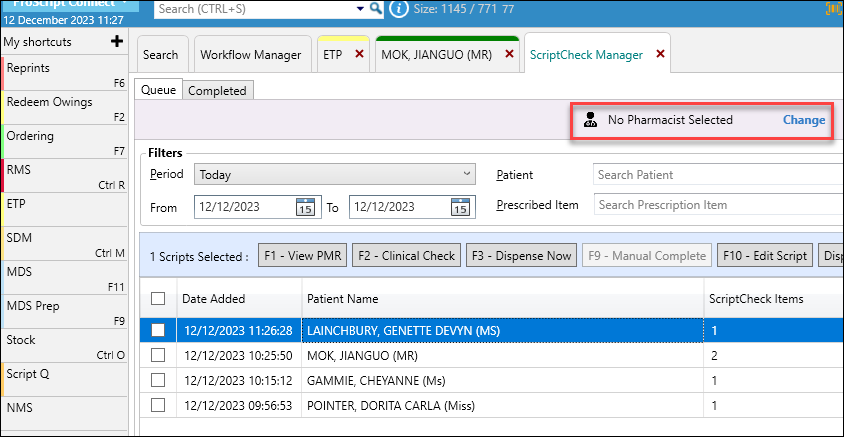
- The Responsible pharmacist logged in will be the default pharmacist for completing the clinical checks. Their name is visible on the top ribbon. To amend, click Change to select the required pharmacist, then click F10 – Save.
The checking pharmacist does not have to be the Responsible Pharmacist.
- Select the scripts to be clinically checked, then click F2 – Clinical Check.
 Tip: To select all scripts in the current filter, tick the top box, beside Date Added.
- On the Clinical Check screen, the first selected script is displayed with the PMR History in the left pane, the script(s) in the centre pane and the highlighted script details in the right-hand pane.
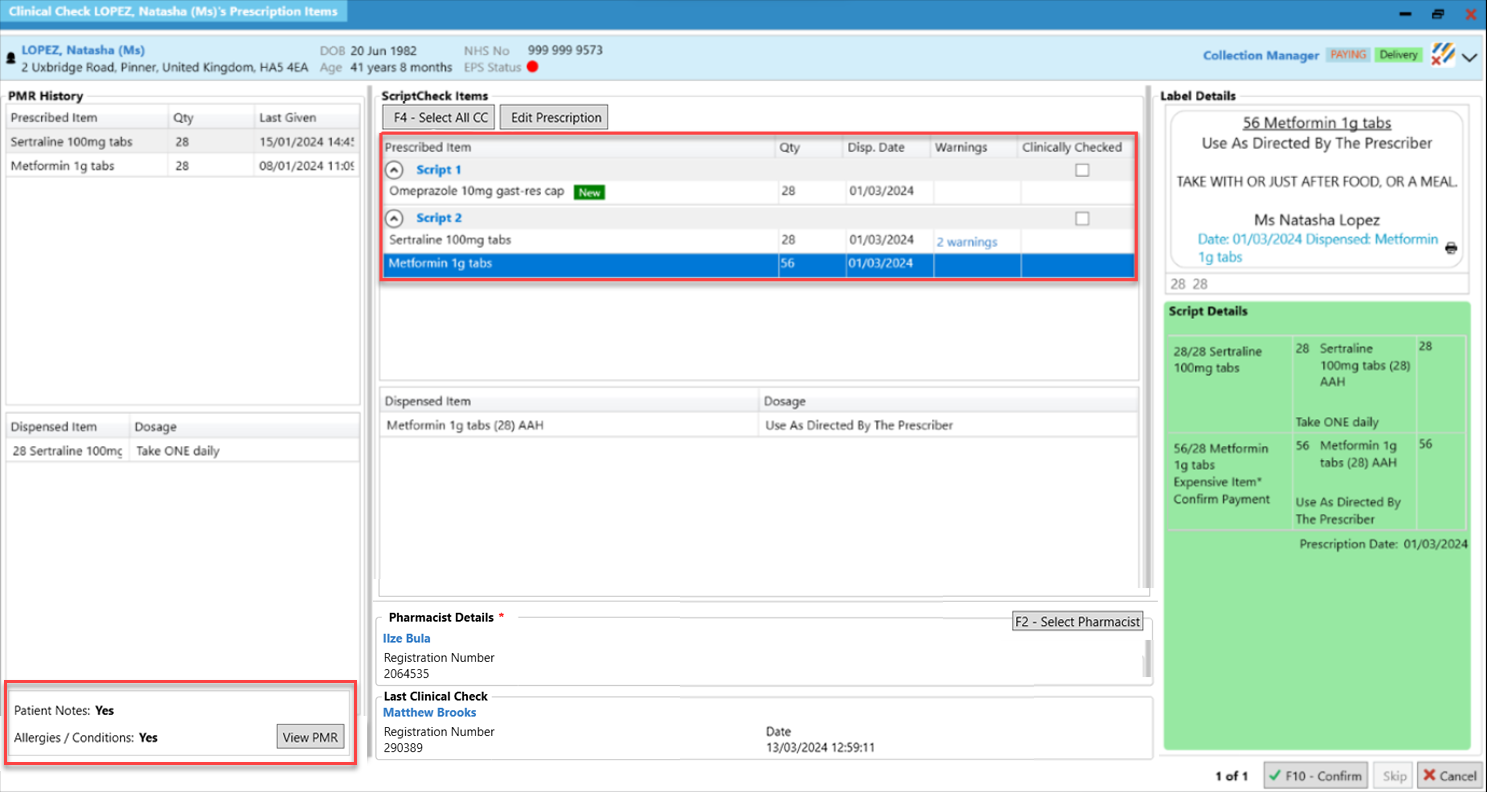
- If the same patient has multiple scripts, they will be displayed together to be reviewed and clinically checked together.
- In the left pane:
- Any prescribing history is displayed.
- If there are Patient Notes and/or Allergies/Conditions recorded, Yes is displayed against each accordingly – to view these details and the full PMR history, click View PMR.
- In the top-centre pane:
- An Edit Prescription option if you need to edit the prescription before the clinical check is completed.
- Each script for the patient is listed, with any blue hyperlink warnings against the medication – click the blue link to view the warning.
- If there is more than one script, use the arrow icon, to open and close the details.
- In the bottom-centre pane:
- The currently selected pharmacist is displayed – Click F2 – Select Pharmacist to add or change: a pharmacist must be selected before the clinical check is completed.
- If the script has retained the clinical check, the details will be displayed under Last Clinical Check with the pharmacist’s name, their Registration Number, and the date of the clinical check.
- In the right pane, the Label Details and Script Details are displayed.
- Once a script has been clinically checked, select Clinically Checked, or click F4 – Select All CC, if there are multiple scripts for this patient.
- Click F10 – Confirm.
- On the ScriptCheck Manager screen, those scripts that have been clinically checked are displayed with a
 tag, along with the pharmacist’s name. If the clinical check has been retained, the date of the retention is displayed.
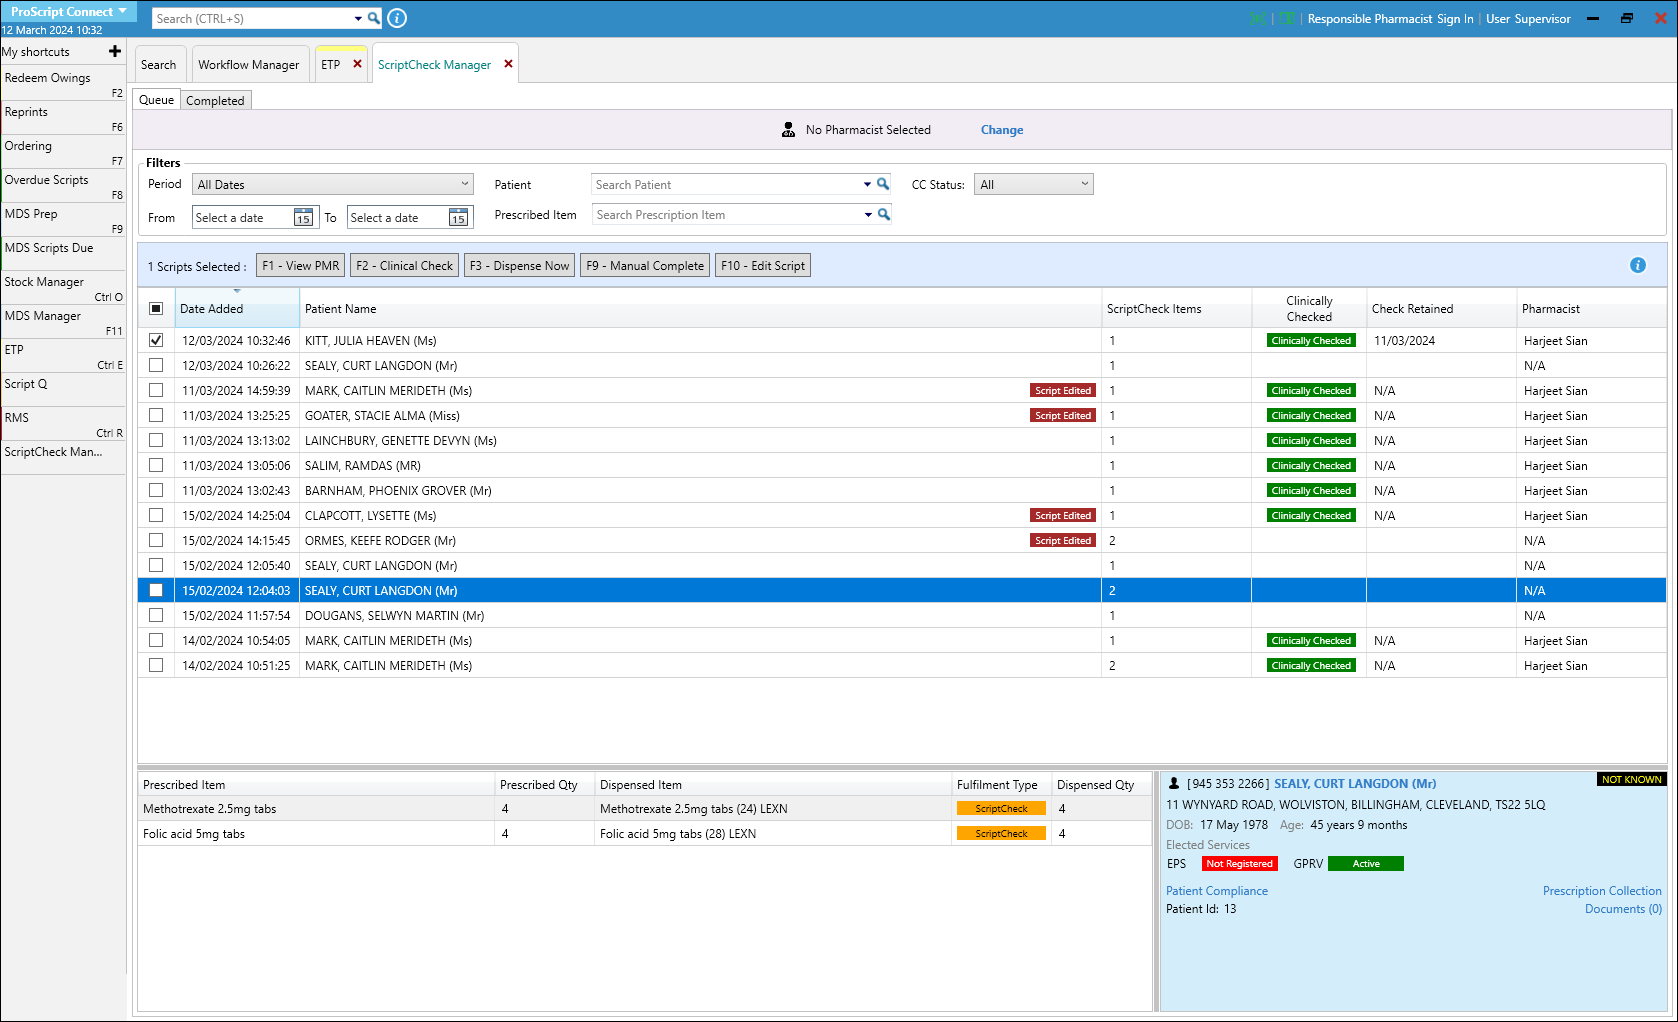
 At any time, a script can be edited, click F10 – Edit Script (subject to the edit being allowed when using ScriptCheck eg. creating an owing is not allowed). Once the edit is complete, the script will be tagged as
  . Remember, that in editing the script, the clinical check will be removed and will need to be clinically checked again. If the required edit is not allowed the item can be removed from the queue and dispensed locally, using F3 – Dispense Now. The clinical check will be removed for any remaining items on the script and will need to be reconfirmed before labels can be printed.
If a patient has several scripts that were clinically checked together, then one of these scripts was edited, all scripts for this patient will have the clinical check reset.
- Once the pharmacist has clinically checked the scripts, using the batch of tokens, other members of the pharmacy team can access ScriptCheck Manager and use F9 – Manual Complete to print and apply the drug labels to the drug packs. Accuracy Checking Technicians can complete the accuracy check.
Owings
Owings can’t be created for items in the ScriptCheck queue. Owings are only permitted for items dispensed locally. Therefore, the required item needs to be dispensed now for an owing, which removes the item from the ScriptCheck queue. In the following steps, the selected item is dispensed locally to create the owing.
- Process the prescription as ScriptCheck. Before completion of the script, select F2 – Create Owing.
- The Create Owing message is displayed advising that an Owing cannot be created.
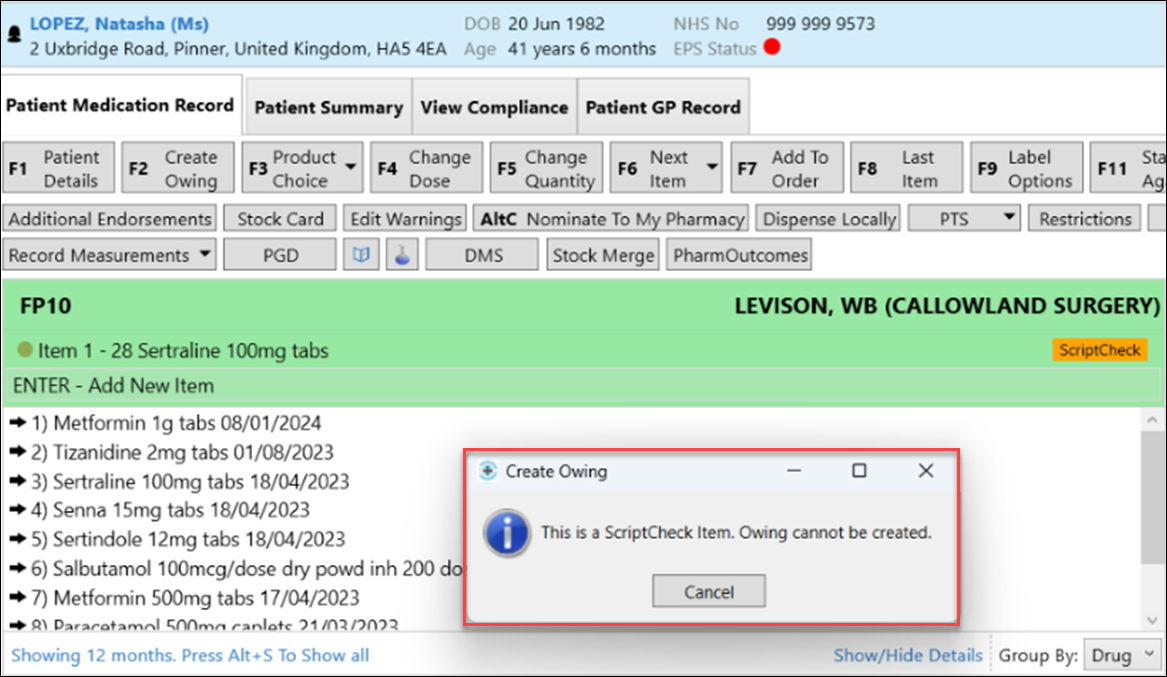
- To continue, click Cancel.
- On the PMR screen, click Dispense Locally, then click F2 – Create Owing.
- Complete the Edit Owing screen as required.
- To complete the prescription and create the Owing, click F8 – Last Item.
If an Owing has been created during the processing of a script using Dispense Locally, the item cannot then be marked as a ScriptCheck item prior to completing the prescription. The Send Item to ScriptCheck message is displayed. Click OK to continue processing locally.

Owings can also be created from Reprints.
We have more guidance on creating an Owing when using ScriptCheck for various scenarios.
 ScriptCheck Owings Scenarios
 FAQs on Owings
Printing labels using Manual Complete
Manual complete gives you the ability to produce labels per patient, in batches, for scripts directly from the ScriptCheck Manager queue without the need to revert to locally dispensing. Completed scripts using this option move to the Completed tab retaining the clinical check, audit and clinical check retention.
In the Application setting > ScriptCheck, you can configure which labels you want to print when using Manual Complete – all labels and/or PTS labels.
 Manual Complete is only available for one or multiple scripts for the same patient that have been clinically checked. If you select a single script to complete manually when the patient has additional scripts in ScriptCheck Manager, a warning message is displayed.
-
- Select all the scripts for the selected patient that have been clinically checked, then click F9 – Manual Complete.

- Click Yes to complete all scripts for this patient. Click No to just complete the single script originally selected.
 Drug labels, the patient bag labels, and PTS labels (if configured) are printed for the selected scripts.
- Keep the drug labels and bag labels with the script token and any previously printed alert labels.
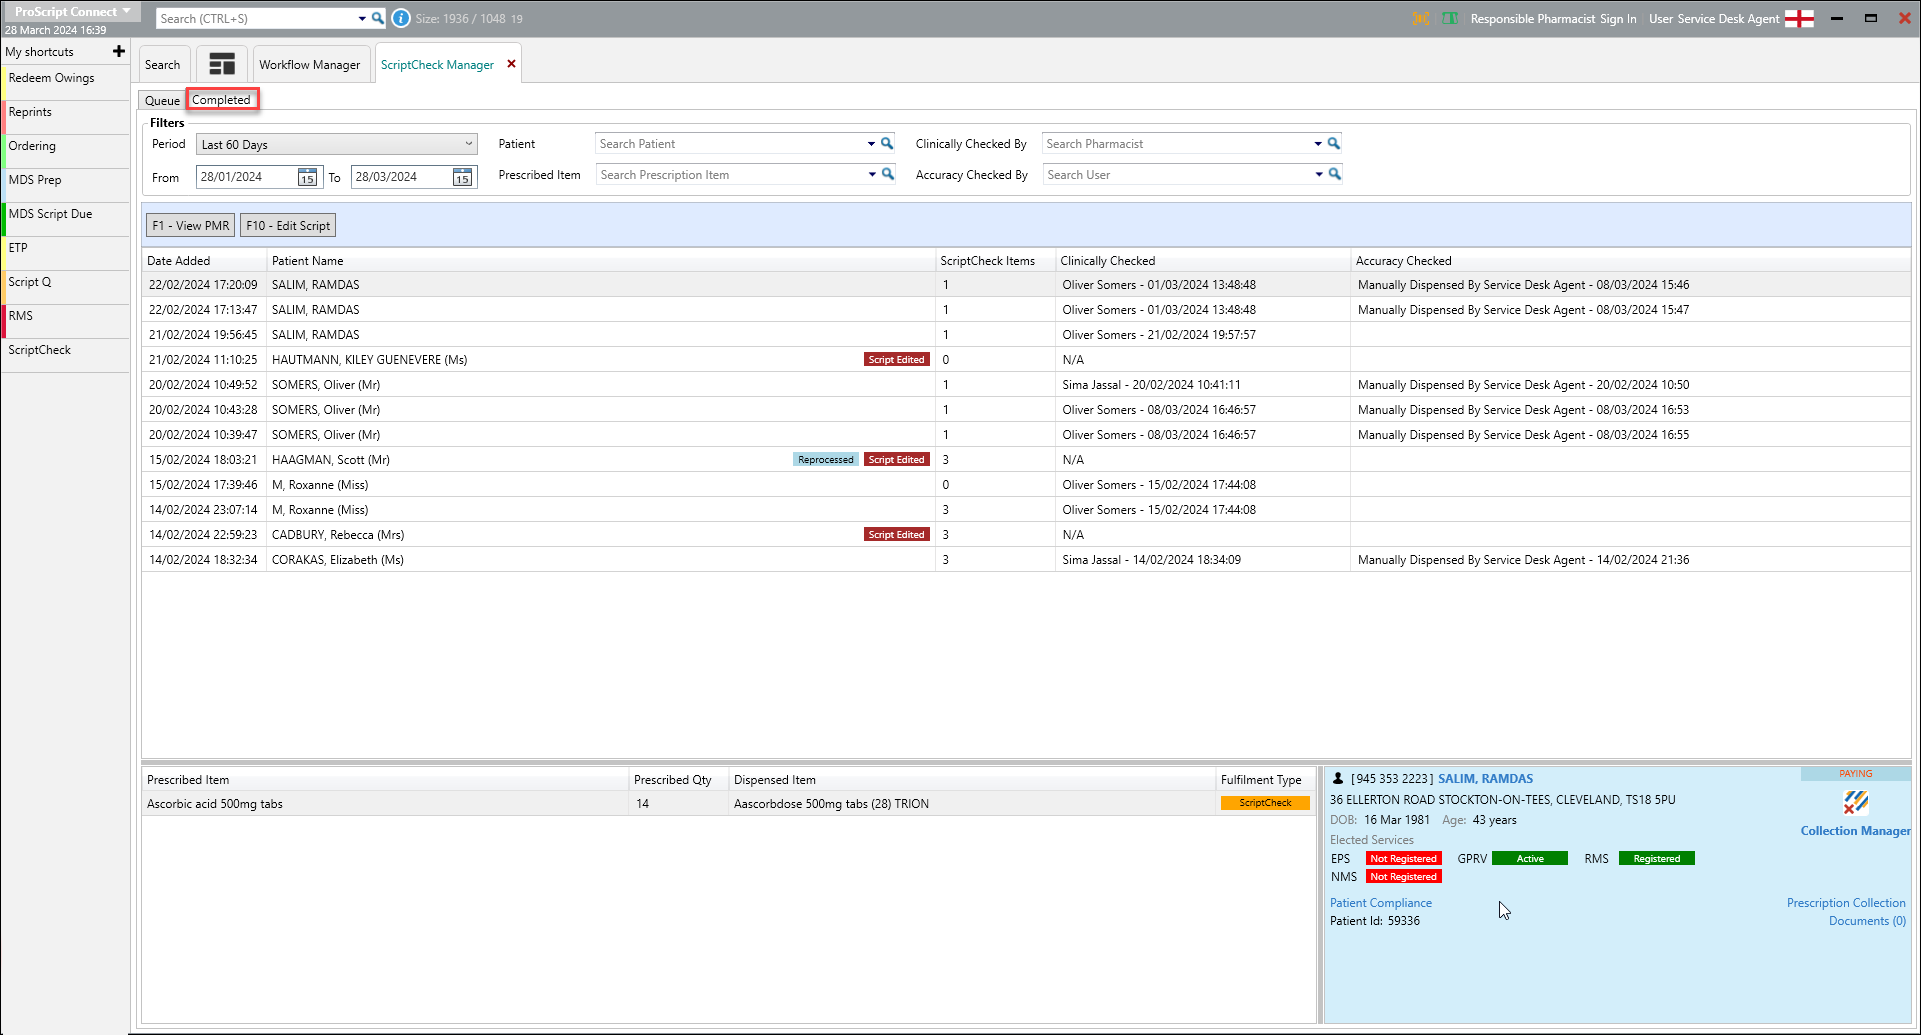
- The completed scripts now move into the Completed tab on the ScriptCheck Manager screen with a full audit.
 The logged in user is recorded as the accuracy checker when using Manual Complete (the user is displayed in the Accuracy Checked column).
Frequently asked questions
We have collated some of your frequently asked questions with the answers.
 ScriptCheck FAQs
KB5001599
