In this article:
- Enrolling the Patient to NMS
- Completing a New NMS
Enrolling the Patient to NMS
Enrolment after Dispensing
- The NMS Notification window automatically displays as a pop-up window when you dispense and endorse an item that belongs to either one of the four target groups.
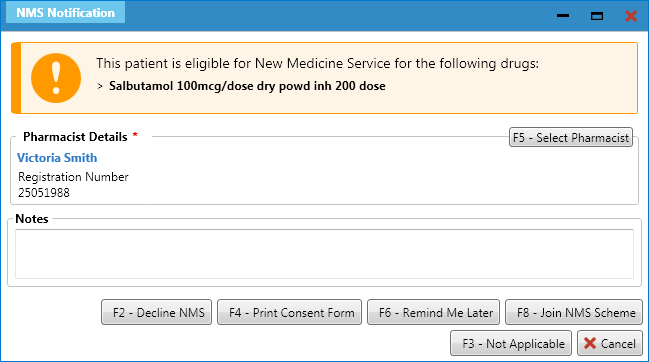
- From the NMS Notification window, select the [F5 – Select Pharmacist] button to select an accredited NMS pharmacist.
- Enter notes if required and select the [F8 – Join NMS Scheme] button.
Selecting the other function keys on the NMS notification will:
| Function Key | Description |
| [F2 – Decline NMS] | This will move the NMS record to the Escaped/Declined tab of the NMS Manager where you can remove the NMS record altogether, or reinstate it to resume the process. |
| [F4 – Print Consent Form] | This will print the NMS consent form. |
| [F6 – Remind Me Later] | This will add the NMS record to the General tab of the NMS Manager ready for you to continue with at a later stage. |
| [F3 – Not Applicable] | This will mark the NMS record as No (Not Applicable) in the Medication(s) History section, and will mean the NMS cannot be claimed for. |
| [ESC] or [Cancel] | This will move the NMS record to the Escaped/Declined tab of the NMS Manager where you can remove the NMS record altogether, or reinstate it to resume the process. |
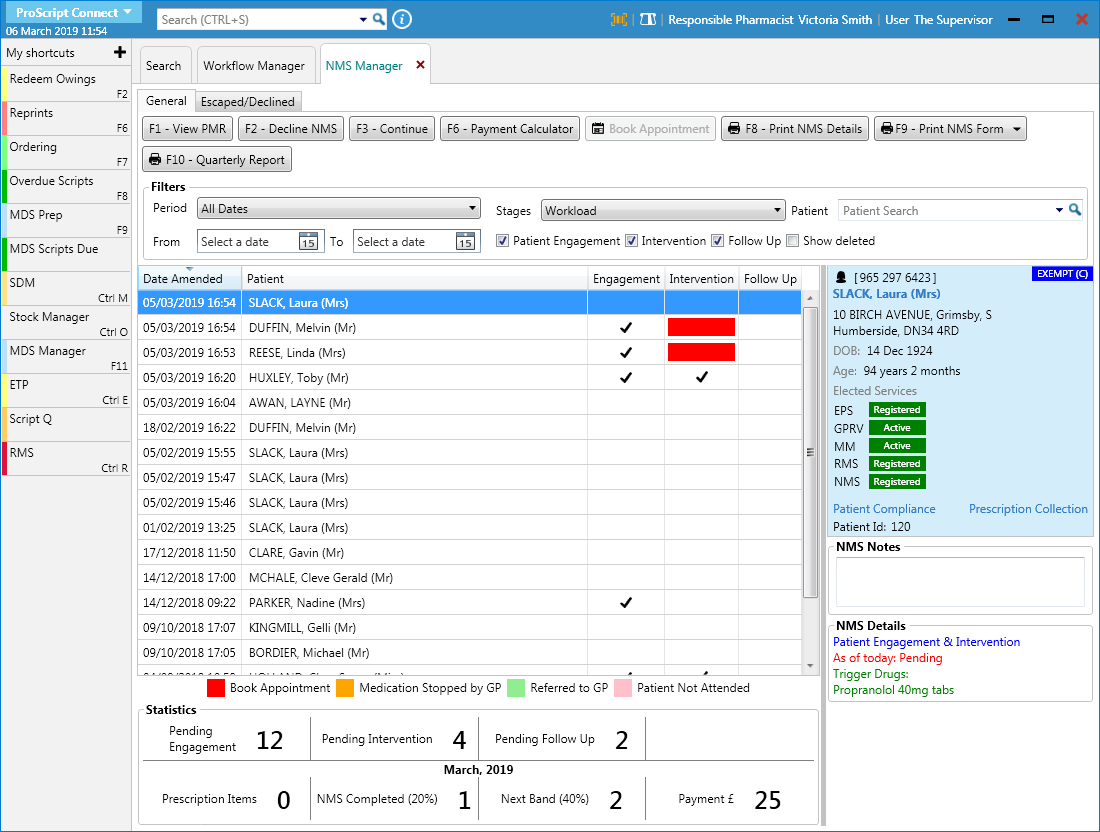
Enrolment from the NMS Manager
If the NMS was not completed after dispensing, and the NMS Notification was declined, escaped/cancelled, marked as not applicable or marked as remind me later, the NMS record will be available to continue with from the NMS Manager.
- To begin, open the NMS Manager from the ProScript Connect Main Screen by clicking the [ProScript Connect] menu button and selecting the NMS Manager menu item.
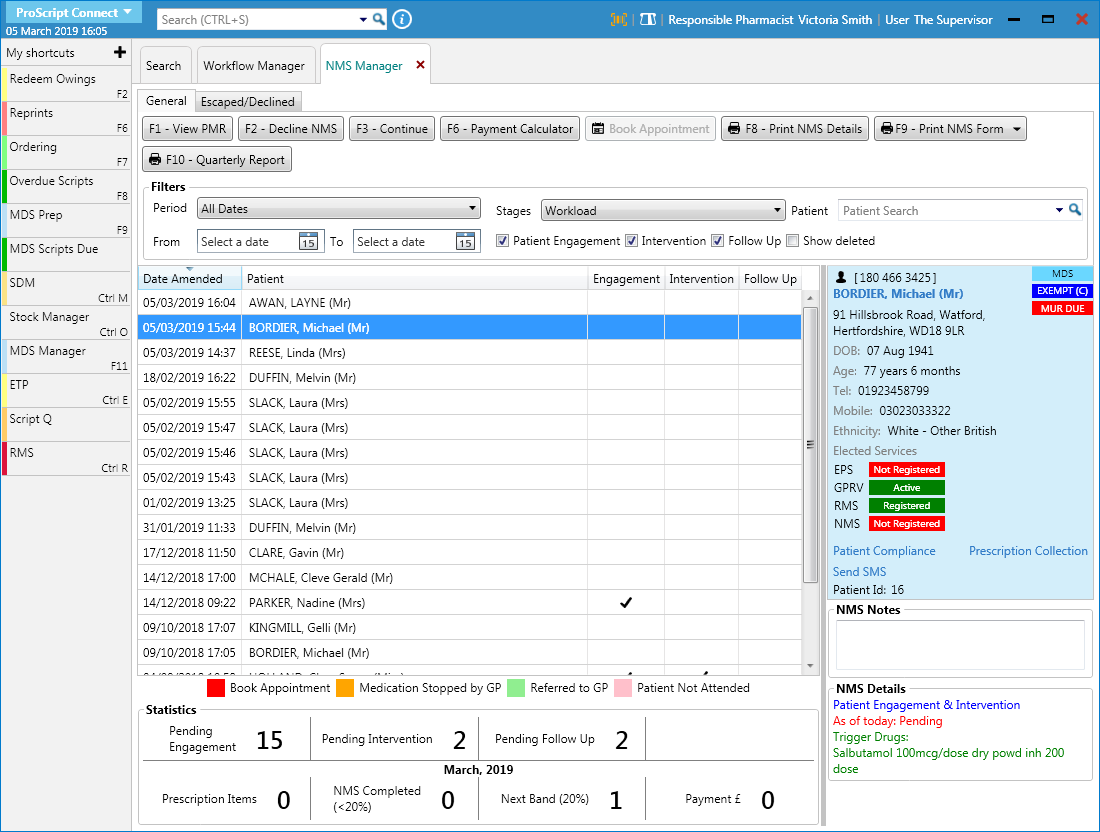
- From the NMS Manager, locate the NMS record that you wish to continue with.
- records marked as not applicable or remind me later will be appear on the General tab. Highlight the record and select the [F3 – Continue] button
- records marked as declined, or that were escaped/cancelled, will appear on the Escaped/Declined tab. Highlight the record and select the [Reinstate NMS] button
Completing a New NMS
The NMS review is comprised of three stages, which once begun, will appear as separate tabs within the review form:
The below function keys are available to use at any time, across any of the tabs.
| Function Key | Description |
| [F1 – View Patient PMR] | Open the patient’s PMR on a new tab. |
| [F8 – Print GP Referral Form] | This button is available on all tabs, but is only activated if the Referral section of either the Intervention or Follow Up Questionnaire is completed. Use this button to print the GP referral form. |
| [F9 – Save] | Save your progress. Any incomplete NMS reviews can be accessed at a later time. |
| [Cancel] | Cancel and abandon the NMS review. |
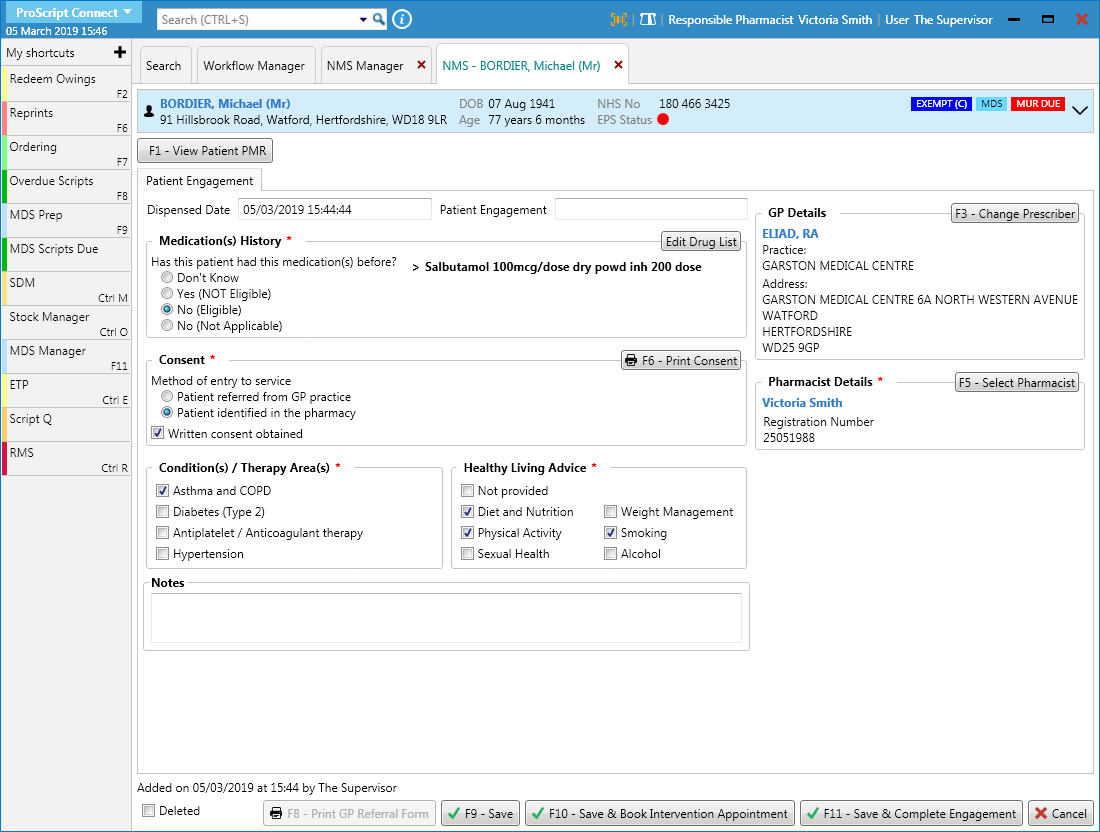
Completing the Patient Engagement
The Patient Engagement tab is displayed.
| Field/Section | Description |
| Medication(s) History |
|
| Consent |
|
| Condition(s) / Therapy Area(s) | Select one or more of the available conditions or therapy areas. |
| Healthy Living Advice | Select one or more of the healthy living advice areas that has been provided. If no advice was given, select the Not provided tick box. |
| Notes | Add any applicable notes if required. |
| GP Details | This information is populated based on the prescriber details saved within the patient’s PMR. This can be edited using the [F3 – Change Prescriber] button to open the Select Prescriber for patient window where you can search for, highlight and select new GP Details to save on the NMS review. You’ll be given the choice to save this on the patient’s PMR too. |
| Pharmacist Details | This information is populated based on the pharmacist details saved on the NMS Notification. This can be edited using the [F5 – Select Pharmacist] button. |
- Once the Patient Engagement tab has been updated as required, you can:
- use the [F9 – Save] button to save your progress and complete the patient engagement at a later stage from the NMS Manager
- use the [F11 – Save & Complete Engagement] button to save the patient engagement as completed. You will need to book the intervention at a later stage from the NMS Manager
- use the [F10 – Save & Book Intervention Appointment] button to save the patient engagement as completed and book the intervention appointment
Booking the Intervention Appointment
After completing the Patient Engagement, you’ll need to book the intervention appointment with the patient. This can be done from two places:
- The Patient Engagement tab by selecting the [F10 – Save & Book Intervention Appointment] button, OR
- The NMS Manager by highlighting the NMS record with an outstanding intervention appointment (a red box), and selecting the [Book Appointment] button.
The Book Appointment for NMS Intervention window displays.

| Field/Section | Description |
| Description | Update the Description field if required. |
| Appointment Date | The system will populate an appointment date based on the Suggested Date Range. This date and time can be amended if required. |
| Notes | Add any applicable notes if required. |
| Patient | The patient information displays in the blue box. Access the Patient Details Form to amend any of the patient’s details by clicking on the patient name. You may also be able to access other services here if enabled, such as Prescription Collection (PTS) and Patient Compliance. |
| Suggested Date Range | The system generated date range for the intervention appointment. This is a read-only field. |
| Appointment Method | Select whether the appointment will take place face to face in the pharmacy, or over the telephone using the available radio dials. |
- Once the Book Appointment for NMS Intervention window has been completed, select the [F10 – OK] button.
Completing the Intervention
If the patient has been instructed to stop taking their medication by their GP prior to the intervention, the NMS will not be claimable.
- To begin, open the NMS Manager from the ProScript Connect Main Screen by clicking the [ProScript Connect] menu button and selecting the NMS Manager menu item.
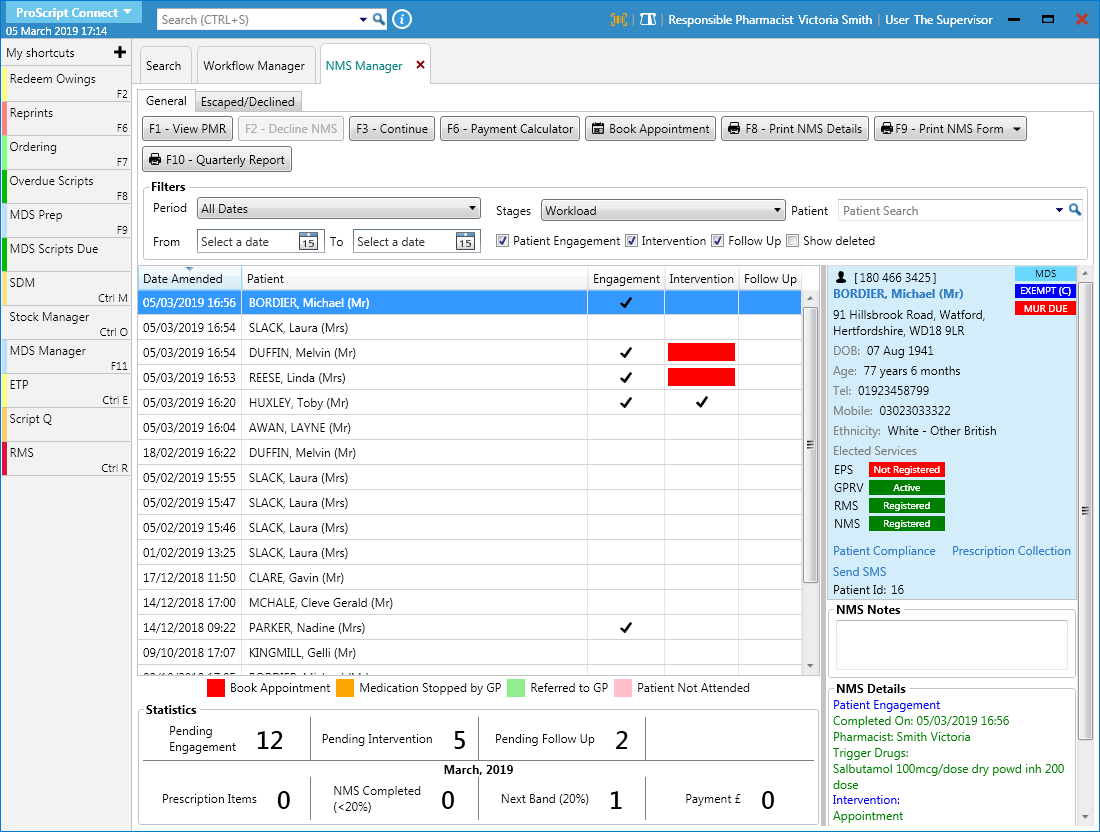
- Use the available Filters to search for, locate and highlight the relevant NMS record with a black tick in the Engagement column.
- Select the [F3 – Continue] button. The NMS window displays in a new tab, with the Intervention tab selected.
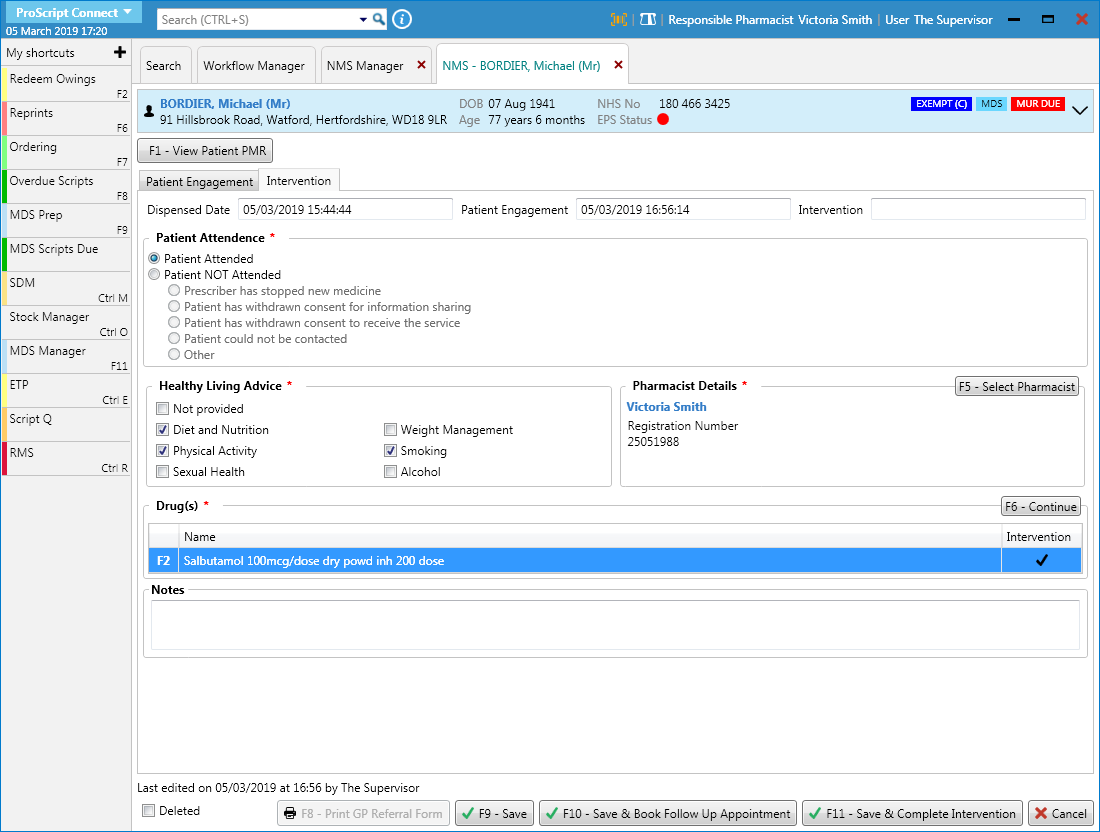
| Field/Section | Description |
| Patient Attendance | Use the radio dials to select whether the patient attended the intervention appointment. If the patient did not attend, use the secondary radio dials to select the a reason. |
| Healthy Living Advice | Select one or more of the healthy living advice areas that has been provided. If no advice was given, select the Not provided tick box. |
| Pharmacist Details | This information is populated based on the pharmacist details saved on the NMS Notification. This can be edited using the [F5 – Select Pharmacist] button. |
| Drugs | Highlight a drug and select the [F6 – Continue] button to open the Intervention Questionnaire. |
| Notes | Add any applicable notes if required. |
Completing the Intervention Questionnaire
Highlight a drug in the Drug(s) section and select the [F6 – Continue] button. The Intervention Questionnaire window displays.

| Field/Section | Description |
| Function Keys |
|
| Tabs | Complete the Matters identified during the discussion with the patient and Outcome of the discussion with patient tabs by selecting the appropriate tick boxes for the review, and add any notes into the Other fields if required. |
- Select the [F10 – OK] button to save the questionnaire. The drug is marked with a black tick in the Intervention column in the Drug(s) section to indicate it has been completed.
- Repeat the Intervention Questionnaire for any additional drugs in your NMS review.
- Once the Intervention tab has been updated as required, you can:
- use the [F9 – Save] button to save your progress and complete the intervention at a later stage from the NMS Manager
- use the [F11 – Save & Complete Intervention] button to save the intervention as completed. You will need to book the follow up at a later stage from the NMS Manager
- use the [F10 – Save & Book Follow Up Appointment] button to save the intervention as completed and book the follow up appointment
![]() Tip: If the patient has been referred to their GP as a result of the intervention, the NMS record will be considered completed and you will not be required to book a follow up appointment.
Tip: If the patient has been referred to their GP as a result of the intervention, the NMS record will be considered completed and you will not be required to book a follow up appointment.
Booking the Follow Up Appointment
After completing the Intervention, you’ll need to book the follow up appointment with the patient. This can be done from two places:
- The Intervention tab by selecting the [F10 – Save & Book Follow Up Appointment] button, OR
- The NMS Manager by highlighting the NMS record with an outstanding follow up appointment (a red box), and selecting the [Book Appointment] button.
The Book Appointment for NMS Follow Up window displays.

| Field/Section | Description |
| Description | Update the Description field if required. |
| Appointment Date | The system will populate an appointment date based on the Suggested Date Range. This date and time can be amended if required. |
| Notes | Add any applicable notes if required. |
| Patient | The patient information displays in the blue box. Access the Patient Details Form to amend any of the patient’s details by clicking on the patient name. You may also be able to access other services here if enabled, such as Prescription Collection (PTS) and Patient Compliance. |
| Suggested Date Range | The system generated date range for the follow up appointment. This is a read-only field. |
| Appointment Method | Select whether the appointment will take place face to face in the pharmacy, or over the telephone using the available radio dials. |
- Once the Book Appointment for NMS Follow Up window has been completed, select the [F10 – OK] button.
Completing the Follow Up
- To begin, open the NMS Manager from the ProScript Connect Main Screen by clicking the [ProScript Connect] menu button and selecting the NMS Manager menu item.
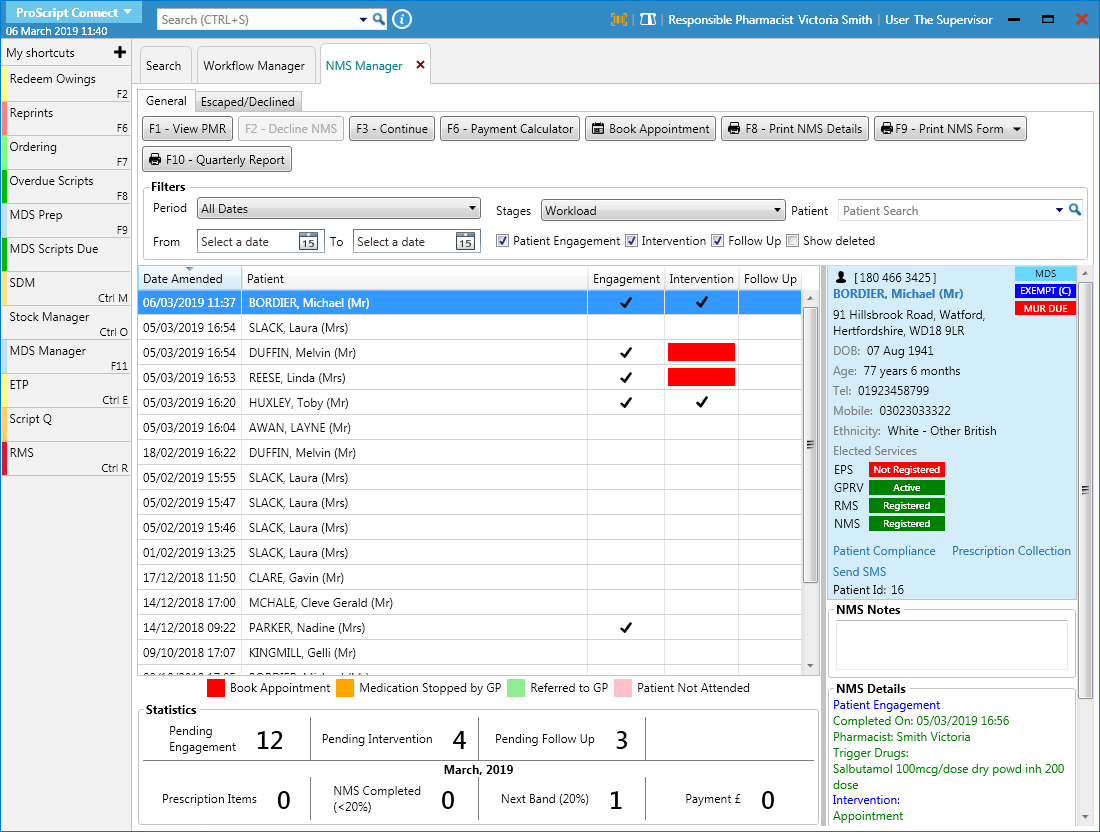
- Use the available Filters to search for, locate and highlight the relevant NMS record with a black tick in the Engagement and Intervention columns.
- Select the [F3 – Continue] button. The NMS window displays in a new tab, with the Follow Up tab selected.
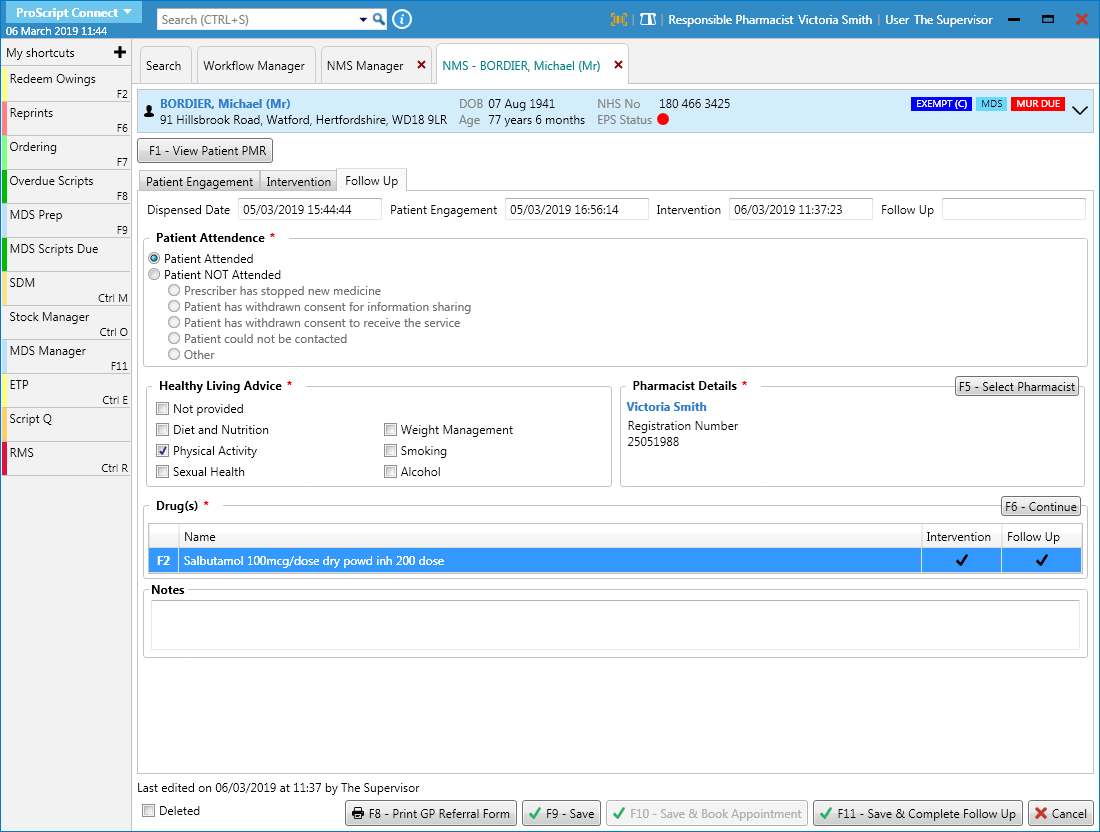
| Field/Section | Description |
| Patient Attendance | Use the radio dials to select whether the patient attended the follow up appointment. If the patient did not attend, use the secondary radio dials to select the a reason. |
| Healthy Living Advice | Select one or more of the healthy living advice areas that has been provided. If no advice was given, select the Not provided tick box. |
| Pharmacist Details | This information is populated based on the pharmacist details saved on the NMS Notification. This can be edited using the [F5 – Select Pharmacist] button. |
| Drugs | Highlight a drug and select the [F6 – Continue] button to open the Follow Up Questionnaire. |
| Notes | Add any applicable notes if required. |
Completing the Follow Up Questionnaire
Highlight a drug in the Drug(s) section and select the [F6 – Continue] button. The Follow Up Questionnaire window displays.
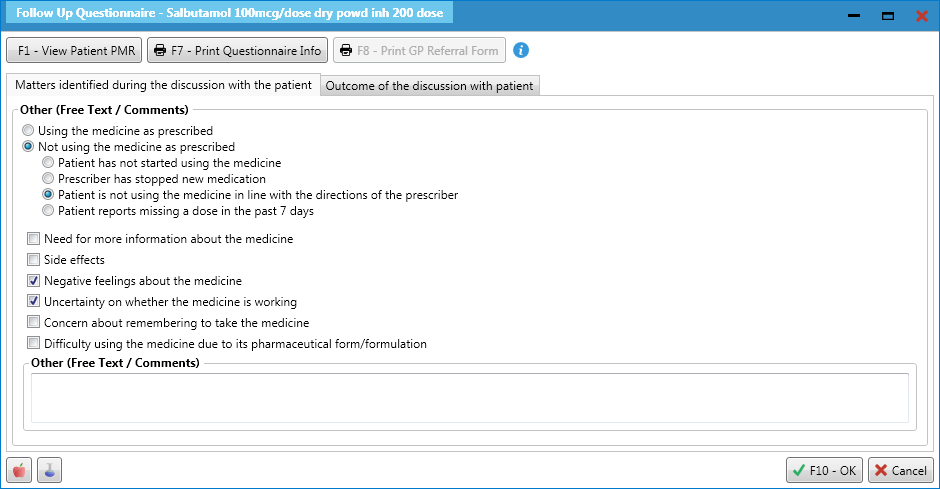
| Field/Section | Description |
| Function Keys |
|
| Tabs | Complete the Matters identified during the discussion with the patient and Outcome of the discussion with patient tabs by selecting the appropriate tick boxes for the review, and add any notes into the Other fields if required. |
- Select the [F10 – OK] button to save the questionnaire. The drug is marked with a black tick in the Follow Up column in the Drug(s) section to indicate it has been completed.
- Repeat the Follow Up Questionnaire for any additional drugs in your NMS review.
- Once the Follow Up tab has been updated as required, you can:
- use the [F9 – Save] button to save your progress and complete the follow up at a later stage from the NMS Manager
- use the [F11 – Save & Complete Follow Up] button to save the follow up as completed. This completes the NMS review, and will remove it from the NMS Workload